Kim and I moved into a new house on July 1st. Well, it’s new to us. The house itself was actually built in 1948 — or before. According to neighborhood gossip, the house survived the 1948 Vanport flood, was sawed in half, moved here, then put back together. (I’m not sure why somebody would haul this house twenty miles and up a massive hill, but maybe they got a great deal on it?)
Anyhow, when we moved in, we knew we were downsizing. The condo we’d lived in for the previous four years had 1550 square feet of space. We each had individual offices. This new place only has 1250 square feet, and there isn’t room for both of us to have an office.
After some thought, I decided it made sense to construct an outbuilding to serve as my writing studio.
Picking a Building
First, I had to research zoning laws in our area. Because we’re in unincorporated Clackamas County (and not inside any city limits), we don’t need permits to put up any building less than 200 square feet in size — as long as the average height is less than ten feet. (The building can’t have wiring or plumbing either. Those also require permits.)
With those basic parameters, I began doing some research.
First, I emailed my friend Pete (a.k.a. Mr. Money Mustache), who recently built a fancy studio of his own. Because Pete is handy — carpentry is his hobby! — he did everything himself. Having seen his studio first-hand, I can tell you it’s awesome. “That’s probably outside your skillset,” he told me. “I recommend you order a pre-fab building from a place online.”
Pete recommended a company in Colorado. While their buildings were indeed awesome, they were also expensive. I wasn’t willing to put $25,000 into my writing studio. But I might be willing to spend half that amount!
Further research online revealed even more awesome custom sheds, but always at custom prices. I was frustrated.
Then one day while at Home Depot, I noticed they had a bunch of garden sheds in the parking lot. Most weren’t really suitable, but a few were. I took home some propaganda. I also stopped by other hardware stores to see what they offered. Turns out there are lots of options. Most of these building are suitable only to store Christmas lights and garden gear, but some could be converted to use as a writing studio.
After a few days of research, I settled on buying from a company called Tuff Shed. I spent several hours on their website, playing with their custom design tool. (Fun fun fun!) In the end, this is the building I created:
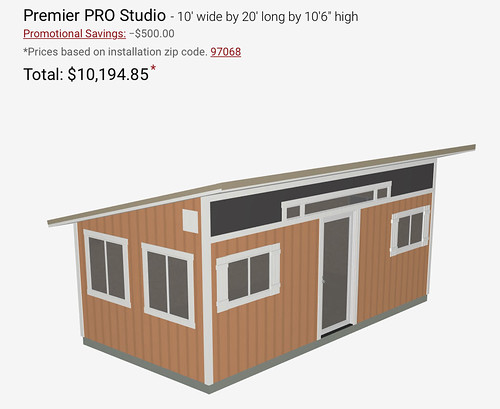
In retrospect, I could have saved some money (and headache) by reducing the number of windows, not choosing the sloped ceiling, and electing to paint the shed myself. But at the time I designed it, all of these things seemed awesome and right.
Waiting, Waiting, Waiting
After designing my Tuff Shed, I placed the order. And waited. And waited. I knew in advance that there’d be a lot of waiting, so that’s not the issue. The issue was that it was tough for me to be patient. I wanted the building now.
Ultimately, it was good that my shed wasn’t delivered until the end of September. Up until that time, our attention was wholly focused on remodeling the house. If the shed had arrived any earlier, there would have been some serious logistics issues. (We don’t have a big driveway, and there’s no place to park on the road. We would have had contractors colliding!)
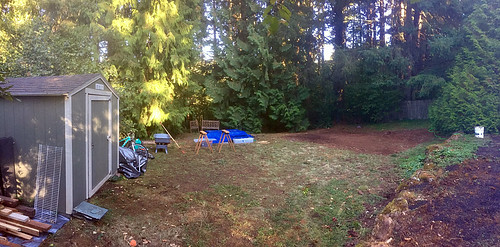
While I waited, I leveled the spot I had picked for the shed to be built. We live in a very slope-y neighborhood. There aren’t any flat spaces anywhere for hundreds of feet. Our lot is no different. Because Tuff Shed requires a flat area to build the building, I had to spend several hours using a spade to dig things to level. It was actually kind of fun.
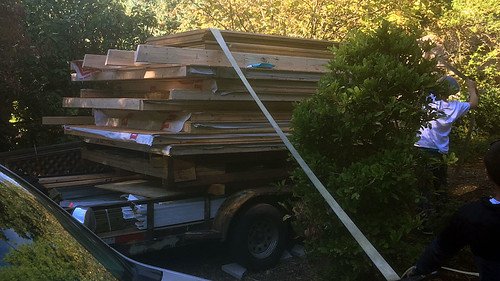
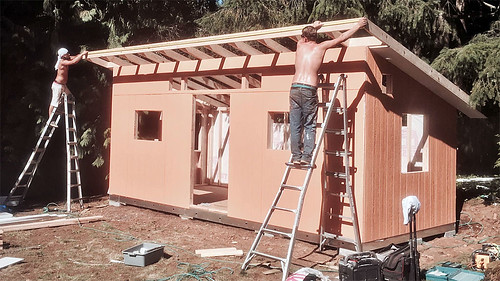
Finally, on a morning at the end of September, two young men pulled up with a pickup and trailer. While one guy hauled the pre-fab pieces to the bottom of our property, the other guy started putting them together.
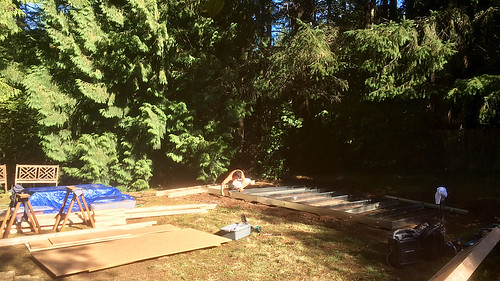
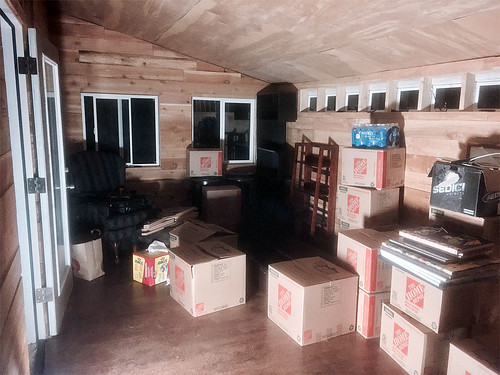
When they were done hauling and piecing things together, I had an empty shed that looked more or less like this:
Now it was my turn to get to work.
Finishing My Writing Studio
I am not a handy fellow. Or, I should say, I never have been before. But the older I get, the more I enjoy trying to figure out stuff like this. I’m cautious with wiring and plumbing because there’s just so much that can go wrong, but I’m happy to tackle other aspects of home improvement. And when the “home” in question is a writing studio, the pressure is especially low.
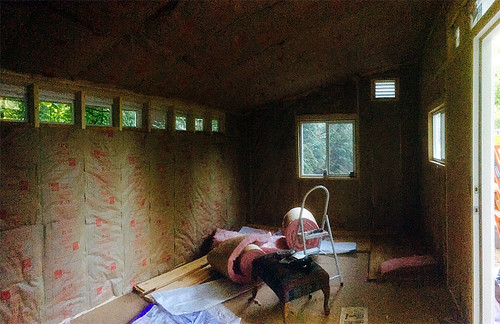
First up, I knew I had to insulate and install some sort of moisture barrier. This is Oregon, after all. I spent a day stapling pink fiberglass insulation to the ceiling and the floors. While it wasn’t tough, it was a bit itchy and nasty. Next, I installed some rigid foam insulation in the floors. The stuff doesn’t have a high R-value, but it’s better than nothing.
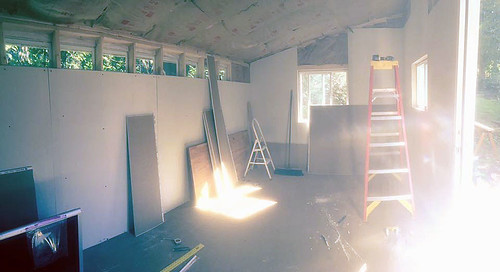
After the insulation was installed, it was time to put up the ceiling, walls, and floors.
For the ceiling, I opted to use a thin plywood. If I knew then what I know now, I would have made sure to cut the plywood to stud lengths first so that it looked good. But this was my first time doing anything like this, so I just nailed it up in 48×96 sheets. “It’s all wavy and warped,” Kim said when she saw it. She’s right. Next summer, I may go back and re-do the ceiling so it looks nicer. It’s not a high priority at the moment.
Next, I nailed sheetrock to the walls. This I did cut to fit the studs. I had learned my lesson with the ceiling. Hanging the drywall wasn’t tough — only time-consuming.
At this point, I had to make a decision. Most folks would opt to tape and mud the drywall so that they could then add texture and paint. This sounded like a long, tedious (and messy) process, so I fished around for other options. My brother suggested using a type of panelboard with a faux distressed wood look. I drove 45 minutes to the only store that carried it, but ultimately decided it wouldn’t work for my application. But I liked the idea of a rustic wood look.
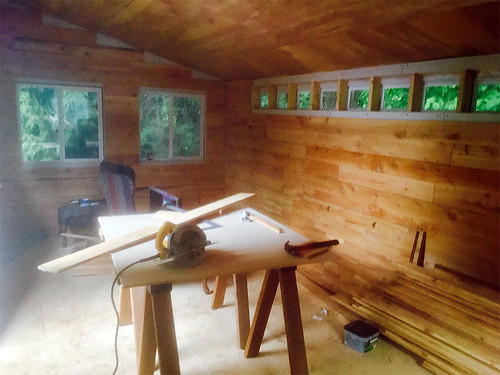
On the way home from this distant store, I remembered that I’d seen a bunch of cedar fencing in my local Home Depot. “I wonder if that would work for the walls?” I thought. I stopped to take a look. Sure enough! The cedar was just what I wanted. I crunched some numbers while standing in the aisle, then loaded up 960 linear feet of cedar fencing. I spent the next eight hours cutting the wood, then nailing it over the top of the drywall. In the end, it looked (and smelled) awesome.
The next problem was the floor. What should I use? Carpet? Raw plywood? Something else? I had already nailed plywood over the insulation, but I decided I’d like something a little more “finished” to make the studio look better. In the end, I opted for laminate flooring with a hickory finish. Last weekend, Kim and I spent all Saturday (and many beers and curse words) installing the floor. It was frustrating, but the end product was worth it.
Finishing Touches
After the floor was installed, I could finally start shaping the space to be an actual writing studio.
- When we moved into the house, the previous owners had left a corner desk from IKEA. I unmounted the desk from our guest room, then installed it in the corner of my shed.
- I had planned to build custom bookshelves for the space, but eventually decided this would be both time-consuming and expensive. Besides, when I did the math, I realized I had exactly twenty feet of shelving already. The heights weren’t quite what I wanted, but it seemed foolish not to use my existing bookshelves.
- Kim and I debated whether or not we should put a futon in the shed. In the end, I decided I wanted the easy chair and ottoman that I bought in 1993. The colors seem garish by modern standards, but I’ve read and wrote a lot in that chair. It’s a sentimental piece.
- Lastly, I chose to move a small table into the center of the room. This IKEA table has been my writing desk for the past five years, but now will serve as a place for me to write by hand — or to play games when people come over.
These finishing touches really pulled the room together. It feels cozy and warm. I like it. The cats like it. The dog loves it.
Because I’m trying to keep things legally unpermitted, I didn’t run electricity to the building. So, how do I power my computers? A big-ass extension cord. I chose a cord that’s rated for outside use and which can provide sufficient power. My electrician groaned when he saw what I’d done, but after a private email exchange, he seemed resigned to my choice — as long as I’m careful about everything. (I turn everything off when I’m not in the studio. I’m going to get a cover to protect the joint where my two extension cords meet. And I’m going to get a low-power wall heater that my electrician recommended as a safe option.)
In the end, the Tuff Shed cost me about $10,000 to have built, delivered, and installed. I spent an additional $2500 to finish the inside. It cost me a total of $12,500 to build my writing studio, which is exactly half of what it would have taken to order from the place Mr. Money Mustache had recommended. That seems reasonable to me.
And best of all? I love the space. It’s awesome. It’s the perfect place for me. I look forward to many years of writing about money from my Tuff Shed writing studio.
I think the sloped roof will be a benefit over the long haul, given snow and other weather concerns.
Though those same concerns make me think that your extension cord setup will not work over the long haul. It’s a disaster in the making. You may want to look into what it’ll take for permits and cost to properly wire the shed. And this is coming from a Libertarian who wants to avoid dealing with government red tape whenever possible!
I’d also be concerned if any electrical fires break out in this setup, the insurance company won’t pay out due to the jury-rigged nature of it.
Very cool. I love your solution for the walls. I agree with Shawn about the extension cord, though. Don’t be a half-ass shed owner. Maybe you could rig up some solar power and propane heat.
Yeah, I think the long-term solution is to actually get an electrical permit and wire the shed for electricity. And I like how you turned my “half-ass homeowner” bit around on me. Haha. 😉
I love it. It seems you could have skipped the drywall before installing the wood paneling though.
You shouldn’t worry about the insurance aspect. There isn’t an exclusion for “jury-rigging.” There is a saying in the industry “we pay for stupidity.” However, I agree that you should have it wired properly.
I suggest checking the integrity of your Tuff Shed roof every so often. We got a Tuff Shed years ago for garden and camping storage. One day we came in to see that there was a hole several inches wide in the roof. Our impression was that some animal (raccoon?) was using it to access stored birdseed. We covered the hole with metal flashing (to prevent that animal from trying to dig its way in again) and then new roofing material, and so far all is well. But it is a mystery how that hole started in the first place — did the elements (hot S. Calif sun) make the materials deteriorate? Did a big branch from the neighbor’s tree fall on it and crack it open? Overall we are pleased with the shed, and how easy it was to obtain and arrange, so this hole was a bit of a mystery. Hopefully they use better materials now and roof integrity won’t be a problem now days …….
Tuff Sheds seem quite popular in our area, so I suspect others are taking the same permit-free approach (and I know of at least one which is work office). We also took the same permit-free approach to installing a small all-metal (fireproof) studio.
That’s some serious DIY work, J.D.
You’ve got the skills to throw a tiny home together now, right? A little longer, a little taller, a little plumbing, and you’re part of the tiny home nation.
The place looks great.
Cheers!
-PoF
Inspiring! A backyard building for music and writing has long been a dream of mine. It’s probably the only reason we would move at this point (something like this wouldn’t work well on our current lot). Bravo!